Scenario: You need to create a new table in AX and synchronize it into Retail database to use its data on Retail side (extensions). The table must be configured in HQ and then data from HQ must be synchronized into Retail channel.
Step 1. Create a new table / UI / Security etc. in AX
Step 2. Create a new upgrade script. This script is required to create a new ext table for Retail channel if it does not exist yet. Go to your TFS folder C:\TFS\Retail SDK – Dev\Database\Upgrade\Custom. Create a new SQL scrip file there. The script below will create a new YOURTABLE with 2 fields (ItemId and CustAccount). Save this SQL script and make sure it’s located in the Custom folder and checked in
IF (SELECT OBJECT_ID(‘[ext].[YOURTABLE]’)) IS NULL
BEGIN
PRINT N’Creating table [ext].[YOURTABLE]’;
CREATE TABLE [ext].[YOURTABLE](
[ITEMID] nvarchar NOT NULL,
[CUSTACCOUNT] nvarchar NOT NULL,
[RECID] BIGINT NOT NULL
CONSTRAINT [PK_YOURTABLE] PRIMARY KEY CLUSTERED
(
[RECID] ASC
)WITH (PAD_INDEX = OFF, STATISTICS_NORECOMPUTE = OFF, IGNORE_DUP_KEY = OFF, ALLOW_ROW_LOCKS = ON, ALLOW_PAGE_LOCKS = ON) ON [PRIMARY]
) ON [PRIMARY]
PRINT N’Finished creating table [ext].[YOURTABLE]’;
END
GO
GRANT SELECT, INSERT, UPDATE, DELETE ON [ext].[YOURTABLE] TO [DeployExtensibilityRole]; GRANT SELECT, INSERT, UPDATE, DELETE ON [ext].[YOURTABLE] TO [UsersRole]; GRANT SELECT, INSERT, UPDATE, DELETE ON [ext].[YOURTABLE] TO [DataSyncUsersRole]; GO
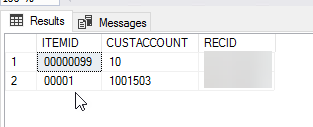
Once this script is run in dev environment, you will see a new table created with no data in SQL management Studio.
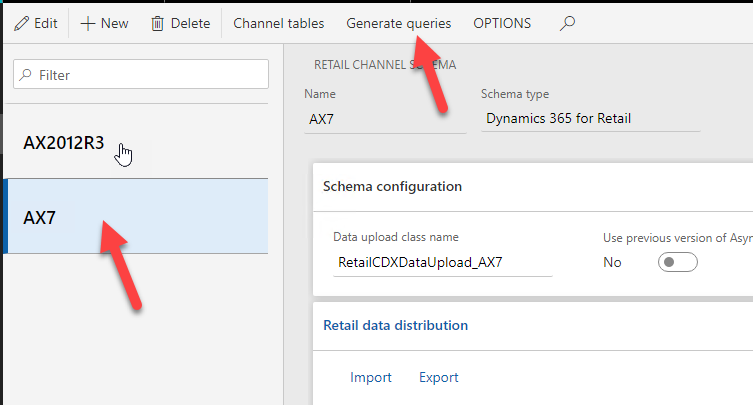
Step 3. Add the new custom table into the synchronization job. Edit RetailCDXSeedDataAX7_Extension file in AX and add the new subjob in the file and map all the fields, including RecId
Scenario. You need to do the POS development on the DEV environment after the SQL DB was restored onto the DEV environment. This is the high – level guide containing basic steps you need to perform (some steps might be missing though).
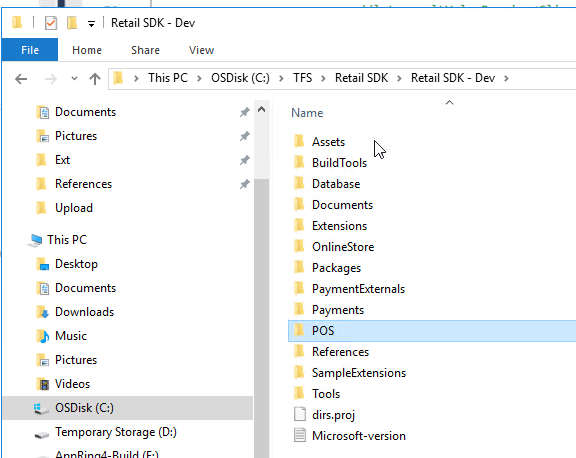
Step 1. Map the VSTS to your local RetailSDK folder. This step is only required if you did not map the VSTS to your local workspace.
Map the VS solution to the local DEV folder (for example C:\TFS\), The folder contains all the POS solutions and folders.
The folders mapped from TFS and containing all POS development folders
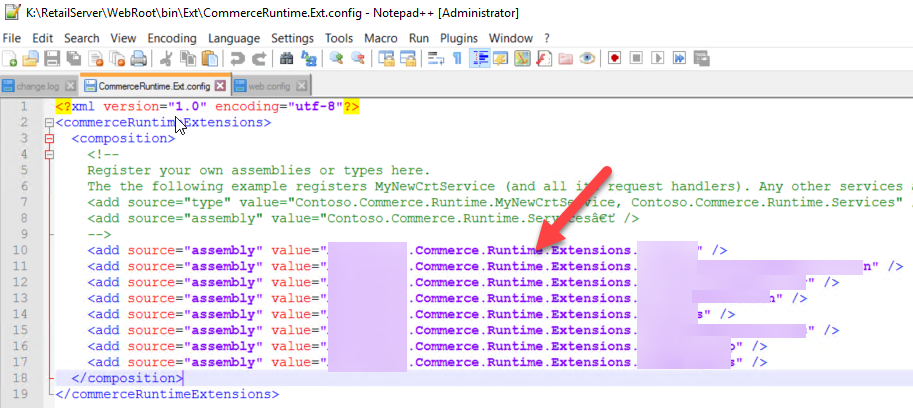
Step 2. Add your server – side extensions to the composition in your configuration file.
Modify K:\RetailServer\WebRoot\bin\Ext\CommerceRuntime.Ext and add your assemblies there in the <composition> section, for example
Add all your extensions to the composition section
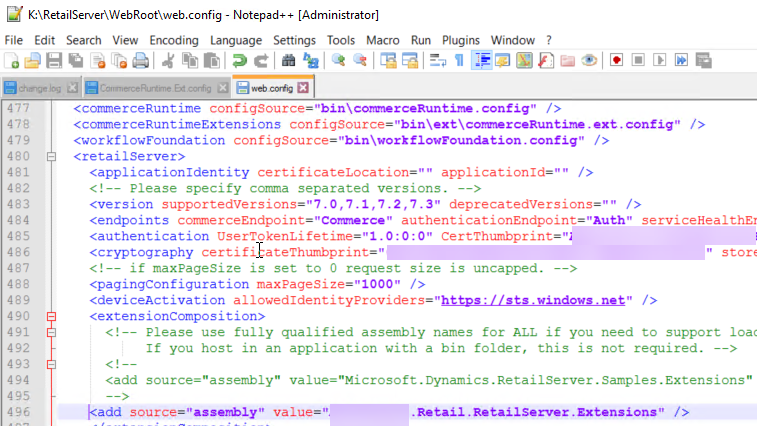
Adjust web.config in K:\RetailServer\WebRoot and add your assembly there in extensionComposition
Add your assembly to the web.config file
Step 3. If you copied over the SQL db from another system, you will first need to synchronize the DB and once there is no synchronization errors, you need to change some Retail related configuration.
Go to new (restored) SQL DB and change RetailConnDatabaseProfile. Copy the ConnectionString from the original AX BD. The ‘original’ is the SQL db which was deployed on this machine when the environment was deployed.
Go to new (restored) SQL DB and change RetailChannelProfileProperty. Once you copied the SQL DB from another system, the values will be related to the ‘other’ system, you need to adjust the VALUE for the URLs and these should be your DEV system URLs, for example https://yourdevelopmentenvironmentdevret.cloudax.dynamics.com/Commerce
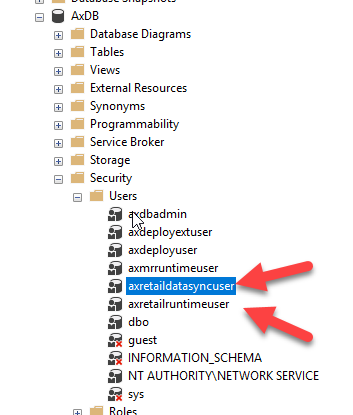
CREATE USER axretaildatasyncuser FROM LOGIN axretaildatasyncuser EXEC sp_addrolemember ‘DataSyncUsersRole’, ‘axretaildatasyncuser’
CREATE USER axretailruntimeuser FROM LOGIN axretailruntimeuser EXEC sp_addrolemember ‘UsersRole’, ‘axretailruntimeuser’ EXEC sp_addrolemember ‘ReportUsersRole’, ‘axretailruntimeuser’
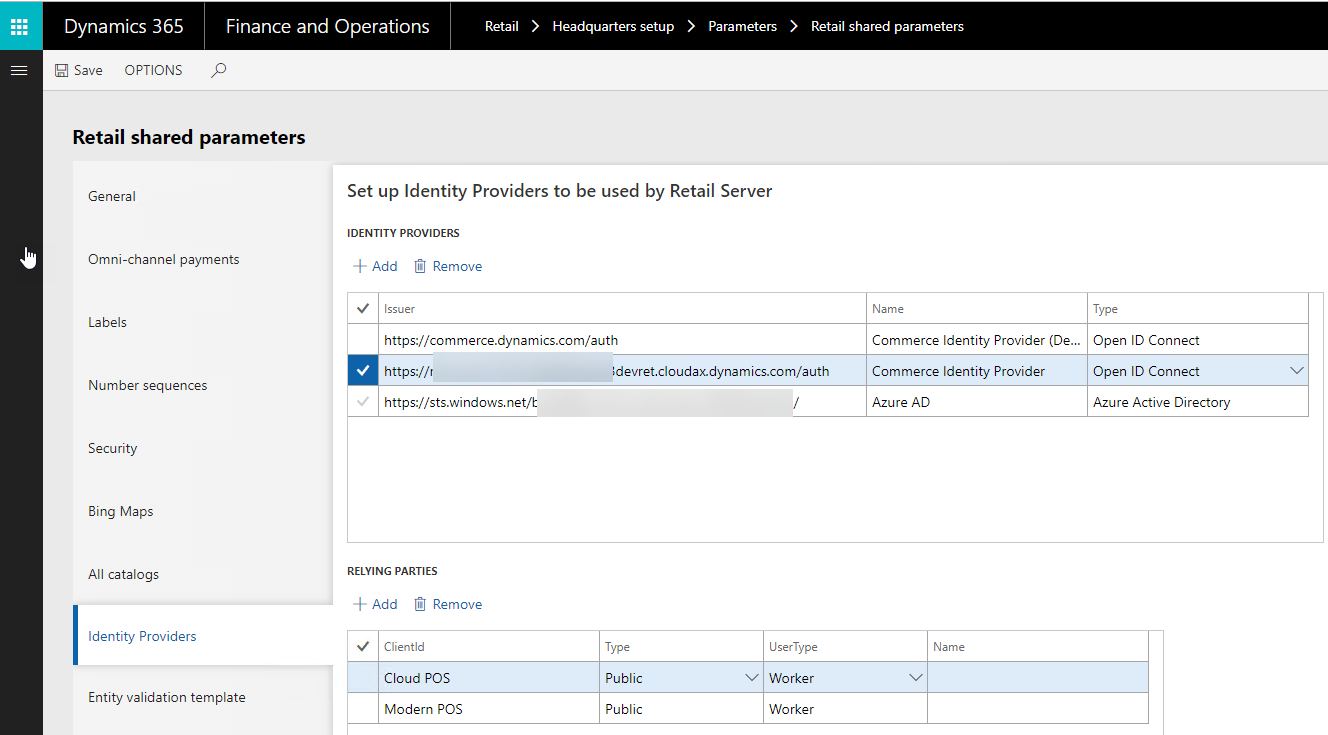
Step 5. Change the identity provider which was also copied from the SQL DB together with the data. Go to Retail shared parameters and change the Identity provider for Commerce identity provider, for example
Change Retail shared parameters and adjust identity providers
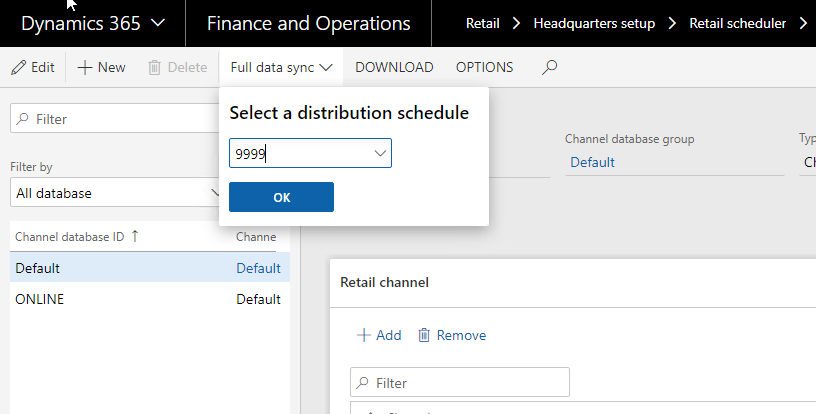
Step 6. Run Full data synchronization
Run full data sync
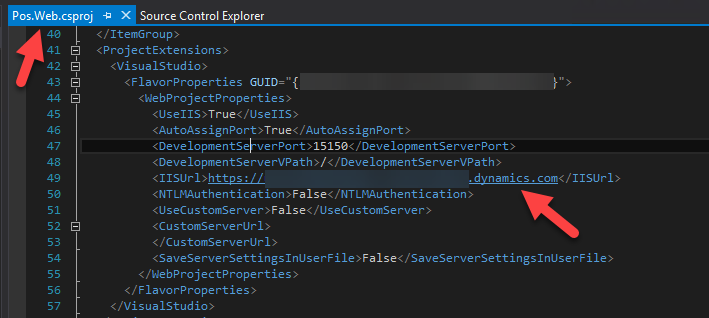
Step 7. Open CloudPos solution and make sure that it can be open in Visual Studio. If Pos.Web project cannot be loaded — edit the project file and change IISUrl to point to your local development IIS, for example https://yourdevelopmentenvironmentpos.cloud.onebox.dynamics.com.
Change IISUrl to point to your local IIS
You also might need to change the configuration if IISExpress is used instead of IIS. Change <UseIISExpress> to be true and <UseIIS> to be False
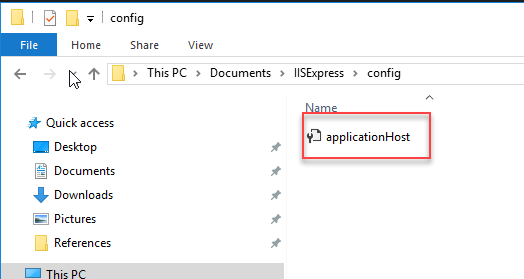
Go to IISExpress configuration and if you only see a single file there (applicationHost), you will need to copy other files there, you need to do so to see your extensions (including debugger)
You will only see this single file in the IISExpress configuratio
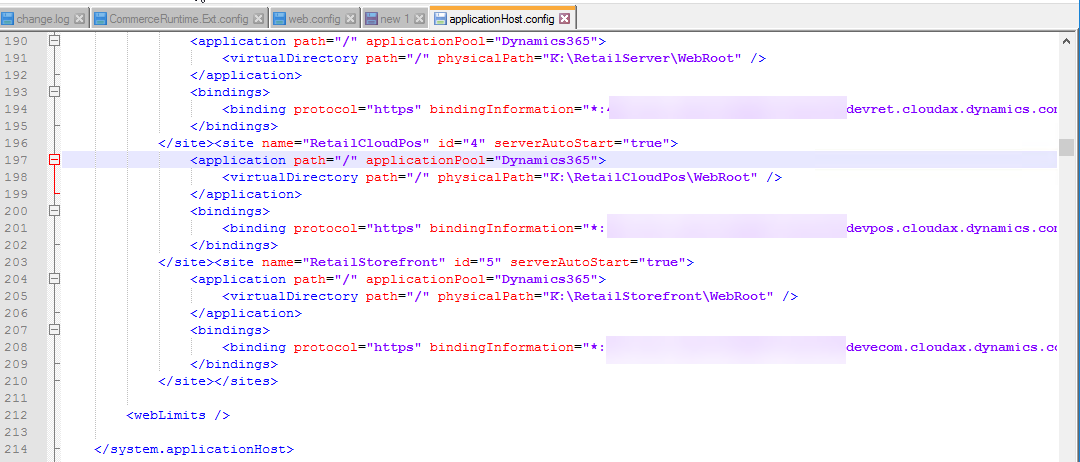
Open applicationHist file and find the applicationPool for Dynamics365
You will find applicationPool for Dynamics365
Change the physicalPath to point to IISExpress path
Change to point to IISExpress path
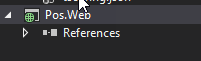
Then reload Pos.Web project and it should be loaded successfully (if it does not –> please check that the parameters and URLs were correctly adjusted).
Build all projects. Copy all your dlls (extensions) into K:\RetailServer\WebRoot\bin\Ext
Once this is done, you should be able to open your CPOS URL and activate your device and then start development / debugging your local DEV environment with the new SQL DB.
Scenario: you need to map D365FO to D365S using CDS, both are online versions, D365FO has a single company which needs to be integrated into a single D365S Org.
This is a high-level guide on how one can connect D365FO (AX) and D365S (CRM) using CDS based integration (one way from D365FO into D365S).
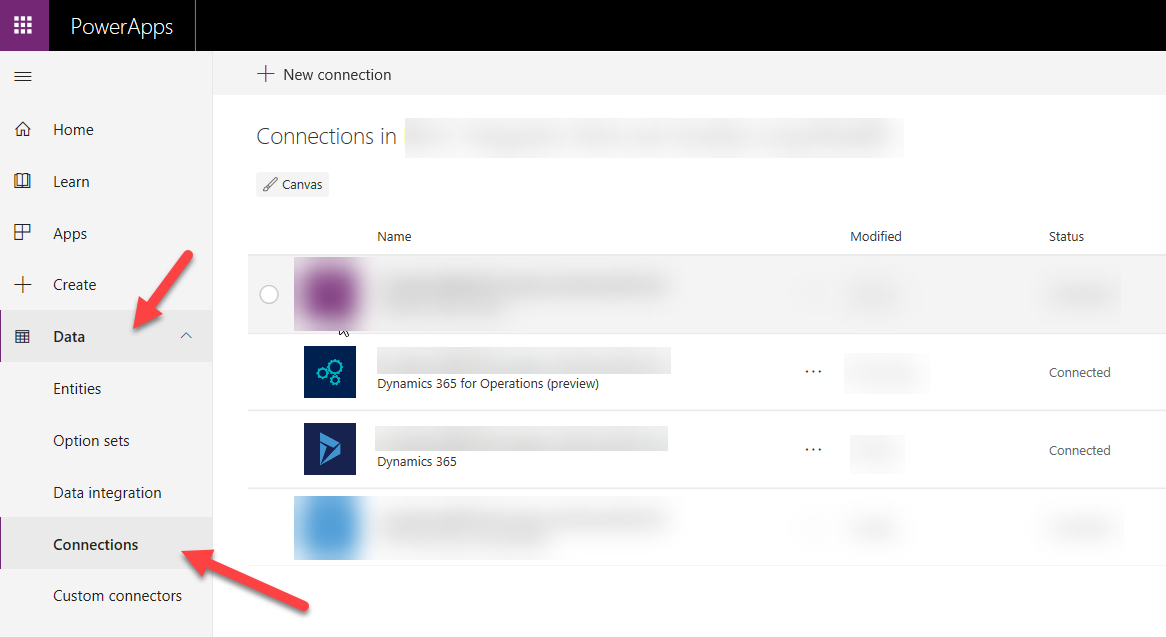
Step 1. First you need to create connections to the source (D365FO) and target (D365S) systems. Go to https://web.powerapps.com/ and in Data / Connections you will need to create your connections
Connections to be createdD365FO (AX) connectionD365S (CRM) Connection
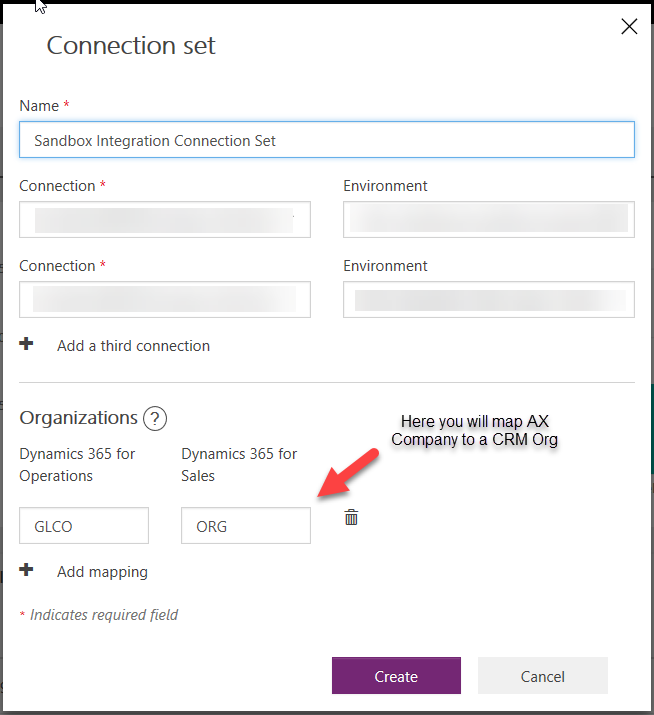
Press a plus button, then choose connections (and environments for each of them) and map the company to a CRM Org. You can add more connections if needed but this guide is for direct integration only. You can also add multiple organization mappings (if you need to map more companies)
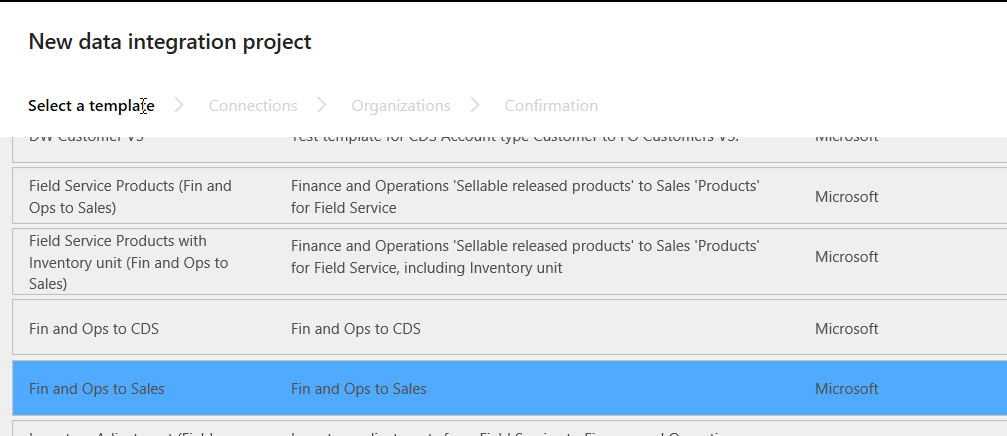
You can choose from a number of templates if you want to start with a template (and then adjust mapping). I will be starting from scratch because there is no Customer (D365FO) to Account (D365S) template available yet, so I will choose Fin and Ops to Sales
Empty integration project template
Then you will have to select a connection set and the organizations to map and finally press Create button
Step 4. Now it’s time to create the mappings. You need to create a new task to be able create the mappings
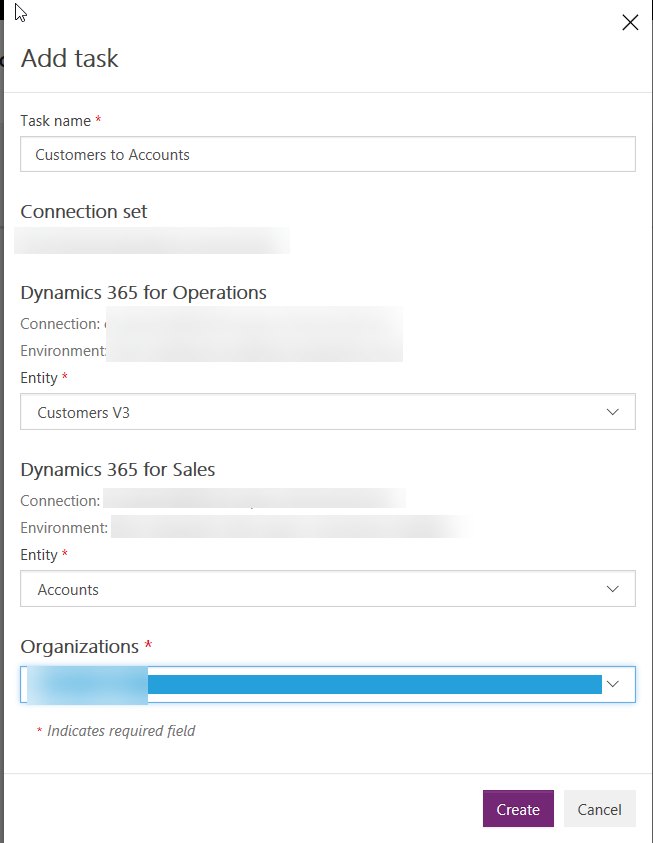
Press Add task to create a new task and specify mappings
When you are creating the task, make sure that you use the correct connection, environments and organizations. In this example I am mapping the standard Customers V3 entity from D365FO to a standard Accounts entity from D365S. Please don’t use Customers V2 entity as it is obsolete in D365FO and therefore will not work.
Create a new task
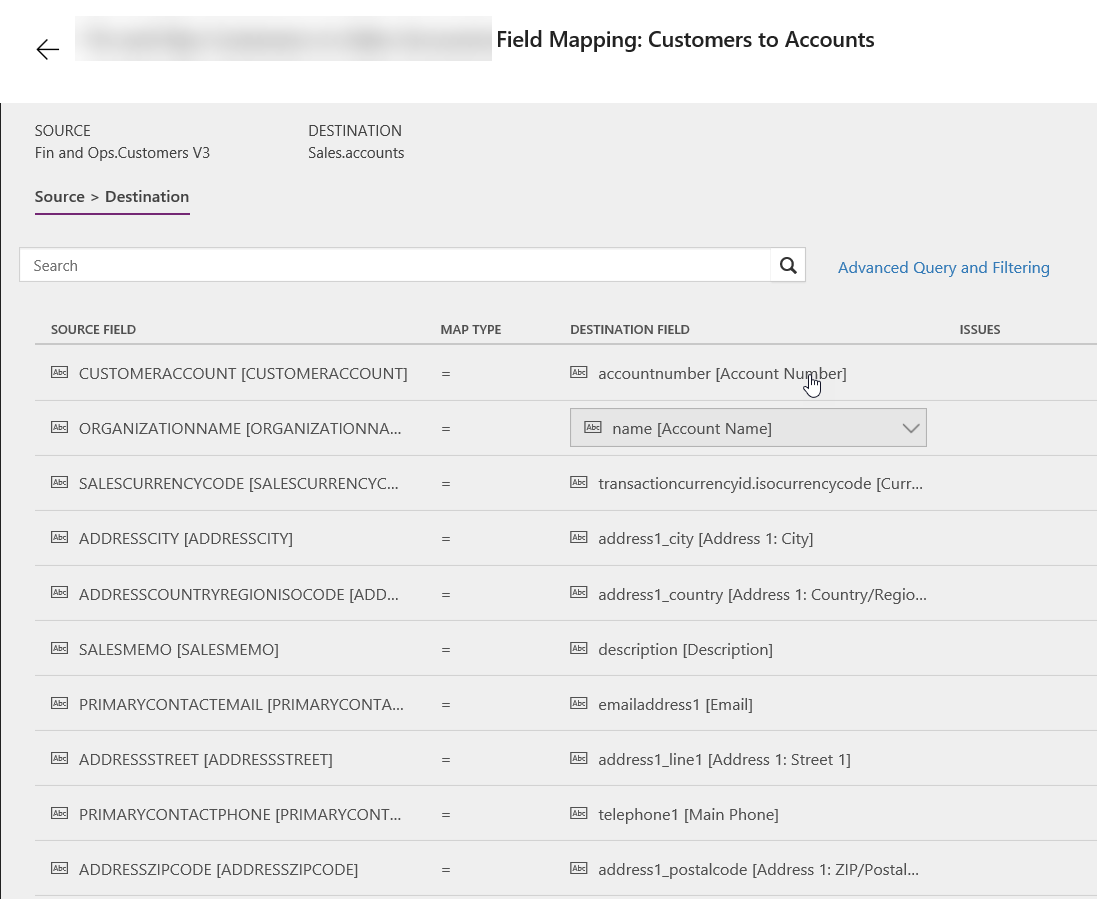
Step 5. Once a new task was created, go to mapping and specify the mapping for the fields by pressing the –> button in the tasks list.
Please make sure you specify the key fields values for the integration as otherwise the map will not work
Fields mapping
Step 6. Run it. Once you’ve done your mappings, you are good to schedule the job to run periodically or run it right away to test whether your integration works
Run it
Optional step 7. Having more fields in your mapping.
If you need to add more fields to the mapping which do not yet exist in D365FO, you will need to extend the standard entities or create your own. You will need to do development to achieve this and deploy the changes to your D365FO environment.
Once your extensions were implemented in D365FO, it’s a good practice to validate whether the new field is available in DIXF before coming back to CDS and add it to the mapping.
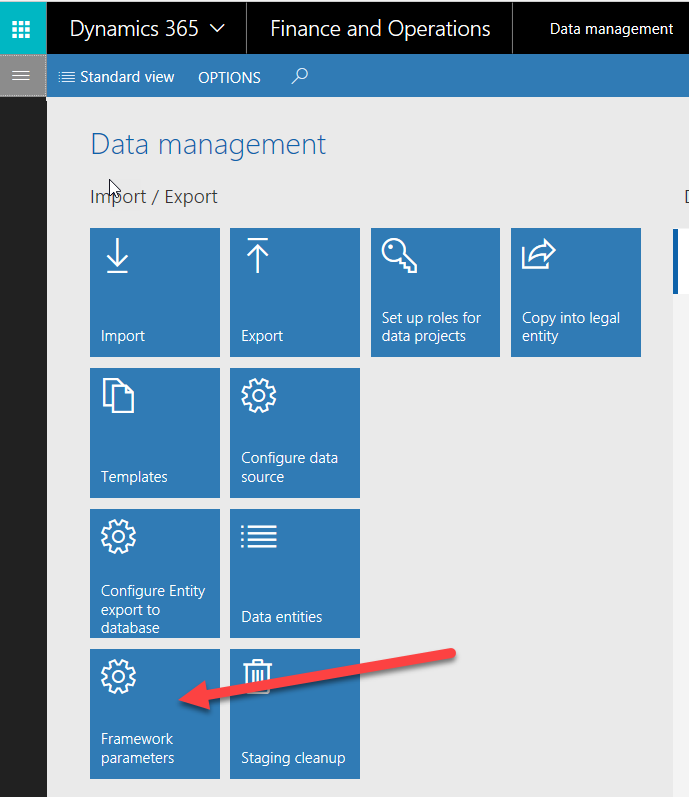
Go to your D365FO environment, then go to Data management and refresh your entities
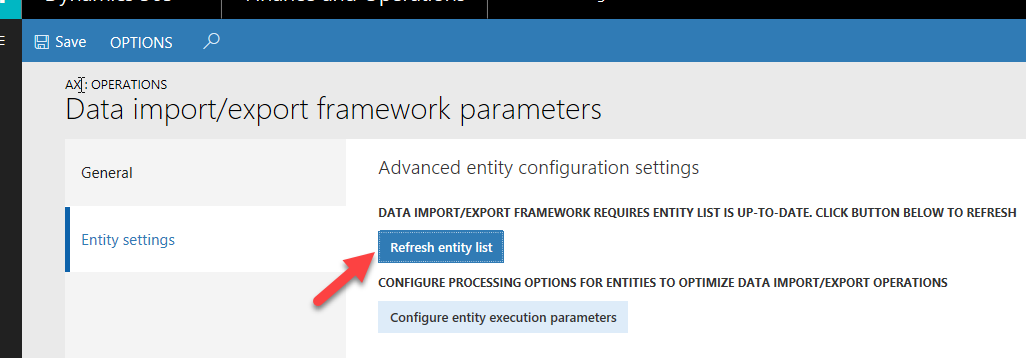
Framework parameters is the place to refresh your extensions for entities you’ve madePress Refresh entity list to refresh all entities
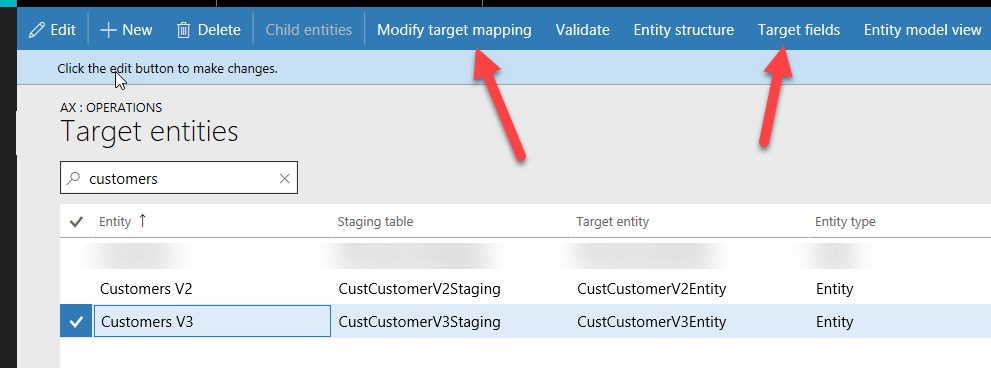
Once your entities were refreshed, you will be able to see your custom fields in the entity. Go to Data management / Data entities and find the entity you modified or created
Customers V3 is the entity which was modified
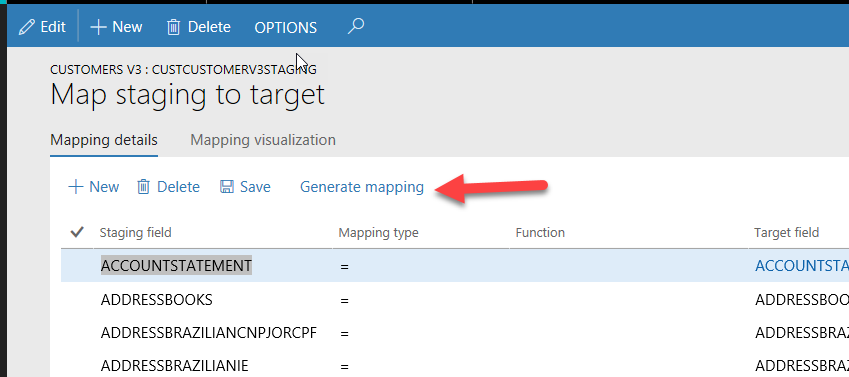
You need to open Target fields and check if you see your fields there. You might need to go to Modify target mapping form and press Generate mapping to regenerate the mapping for the entity
You might need to regenerate mapping
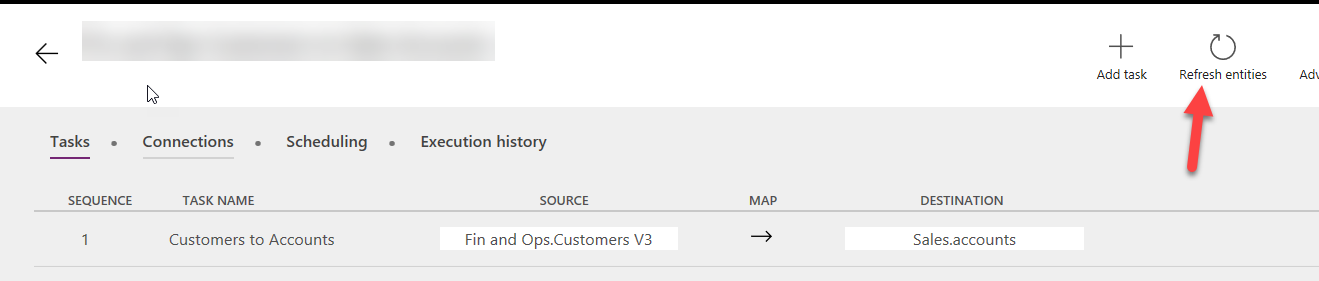
Once you can find your new field in the entity, you need to go back to CDS and refresh entities there
Refresh entities
After this you should be able to use your fields in the mappings
If you need to add more fields to D365S, you just need to do your customization in D365S and then publish. After refreshing the entities you should be able to use the new fields for mapping on D365S side as well.
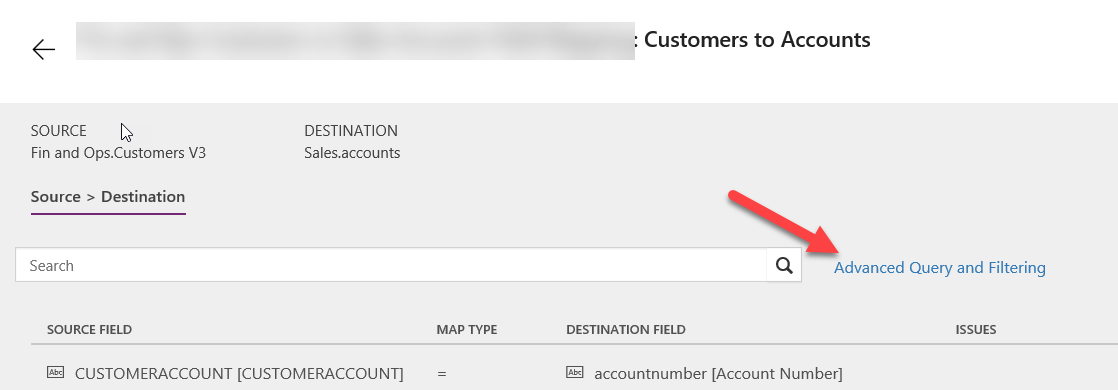
Optional step 8. Using Advanced Query and Filtering. Sometimes you need to filter out some of the records in the source or add calculated fields without customizing the data source. You can use Advanced Query and Filtering for this. First you need to enable this on your project (this cannot be undone)
Enable advanced filtering
Once you enable Advanced Query, you will be able to change the data source and add new fields / filter the records out
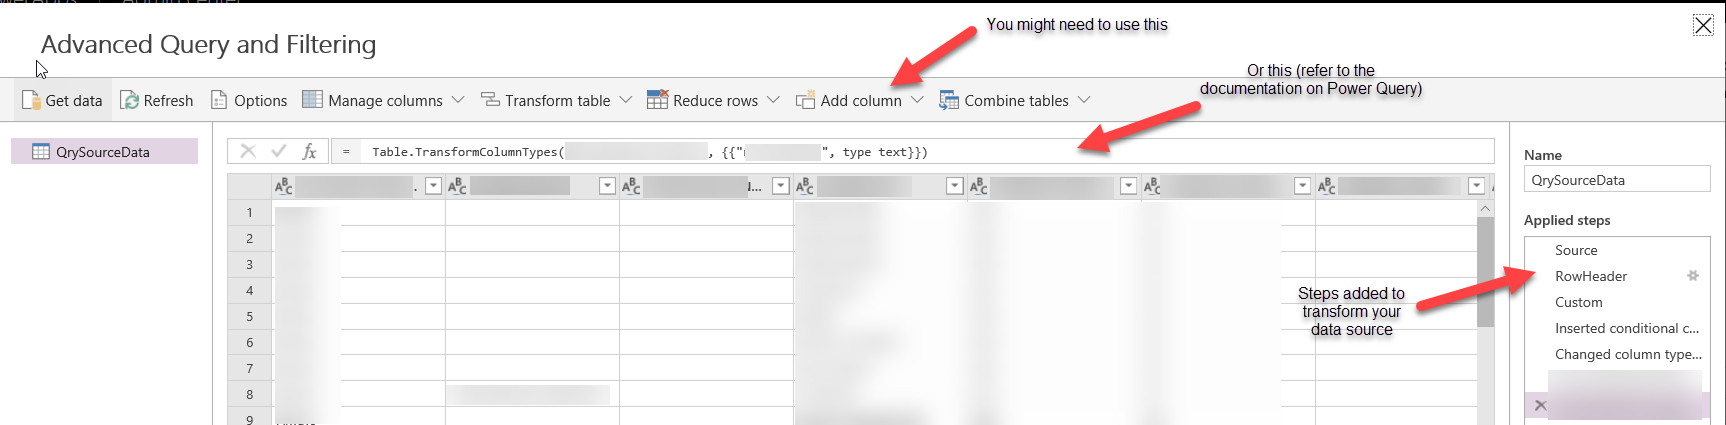
Advanced Query and Filtering
You use Power Query to do some changes to your data source, please refer the documentation on Power Query
Power Query window
Optional step 9. Integrating delta data only. Normally the integration you are implementing should integrate the records which were created or modified since the last run. By default this is not working like that, e.g. on every integration CDS is picking up all records and integrates them all.
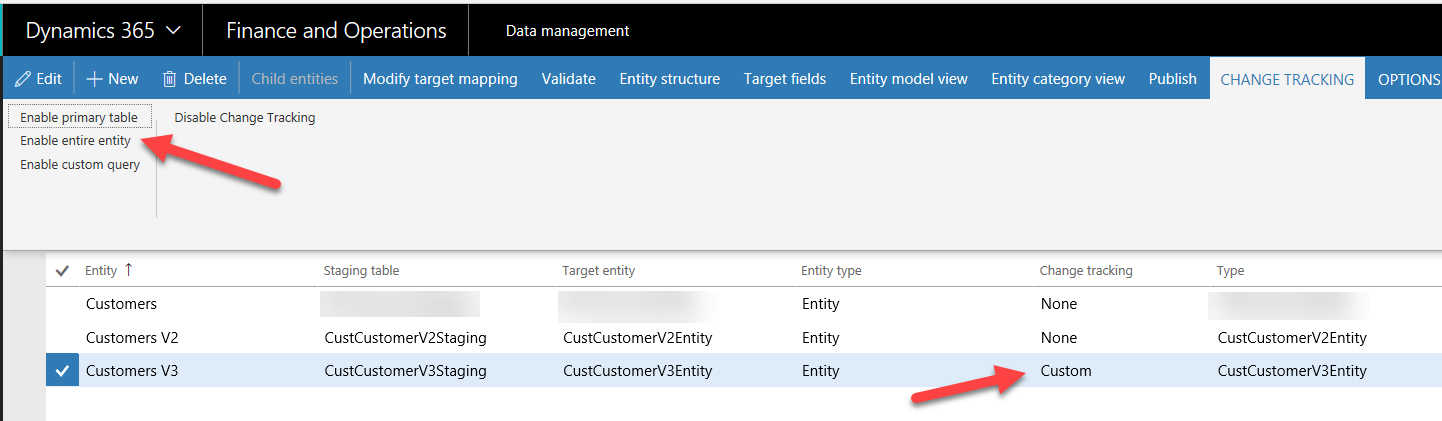
You need to enable change tracking in D365FO in order to synchronize the delta. Go to D365FO and open an entity and then enable Change tracking
Enable change tracking in D365FO
Once you enable this on your data entity, it will send the full set of records the next time and afterwards it will only export the deltas. You can see this in DIXF Job history or execution logs.
If for some reasons you want to send all the records again (for example, you mapped the new field after all the records were synchronized already and you want to update the field for all records now), you can turn Change tracking off, run your maps and then switch Change tracking on again.
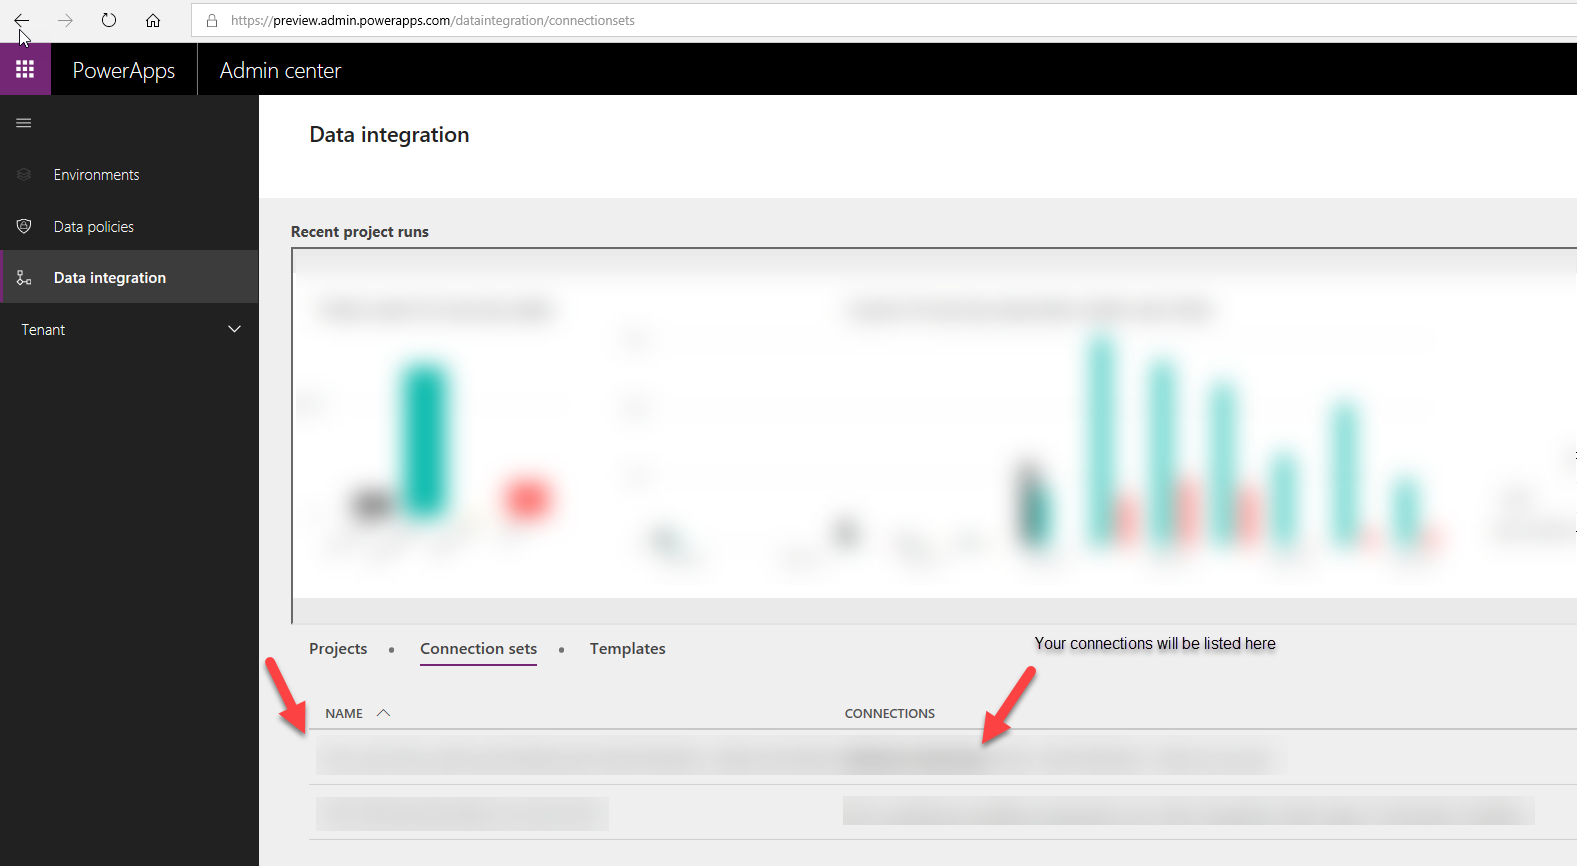
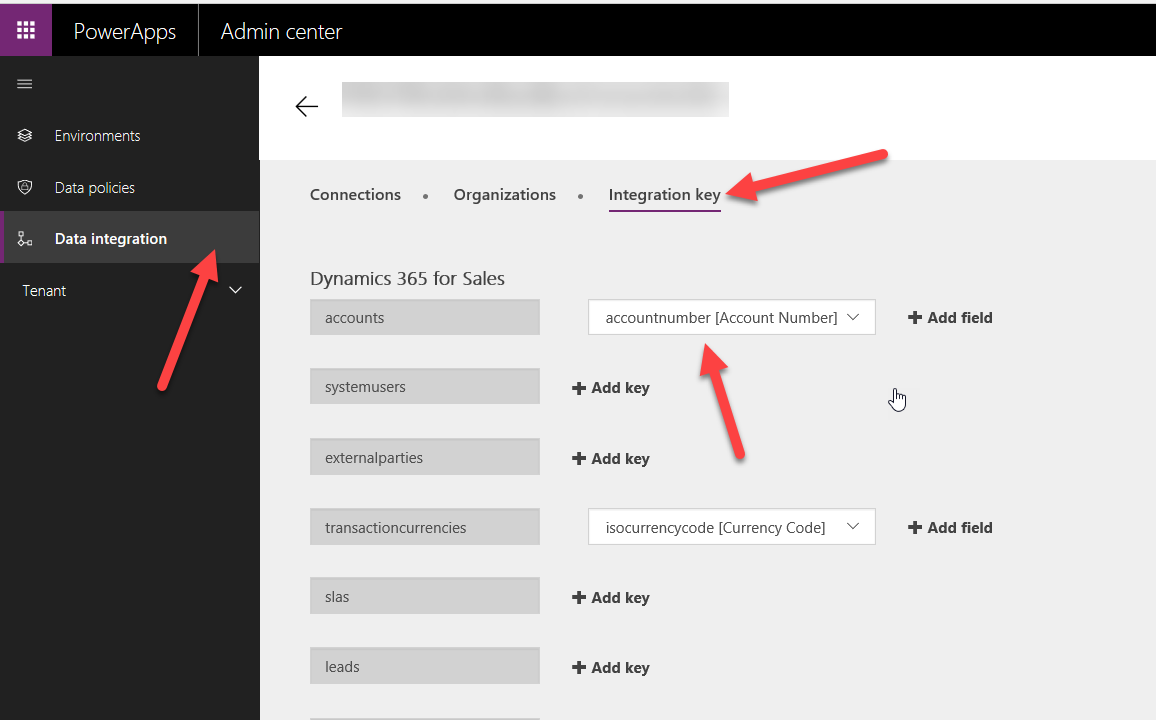
Optional step 10. Integration keys. Sometimes you need to specify a custom integration key to be used when synchronizing the data. For example, you might want to use a custom field in D365S as the key for customer account. In order to achieve that, go to https://preview.admin.powerapps.com/dataintegration and find your connection set there. Then go to integration key tab and build your integration key for the entity
Specify the integration key
That’s it.
Disclaimer: this is just a high – level guide on the integration process, it might have some redundant steps or might work without some of the steps described here. My goal was to share my personal vision on the configuration and process, hope this will be useful as a high-level guide.