Scenario: you need to map D365FO to D365S using CDS, both are online versions, D365FO has a single company which needs to be integrated into a single D365S Org.
This is a high-level guide on how one can connect D365FO (AX) and D365S (CRM) using CDS based integration (one way from D365FO into D365S).
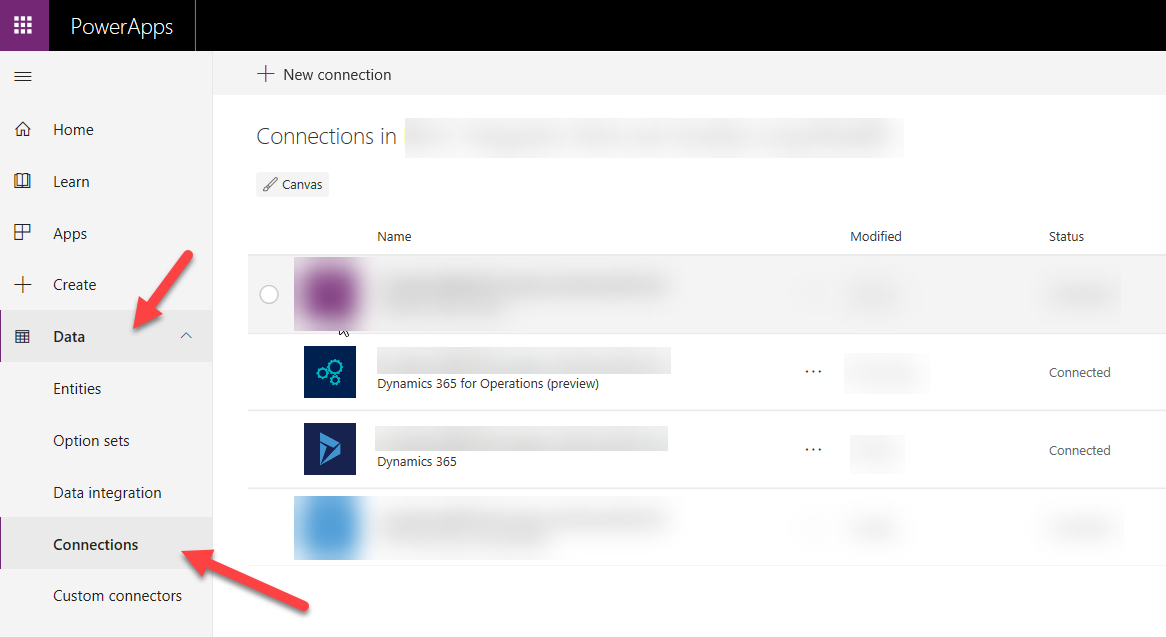
Step 1. First you need to create connections to the source (D365FO) and target (D365S) systems. Go to https://web.powerapps.com/ and in Data / Connections you will need to create your connections


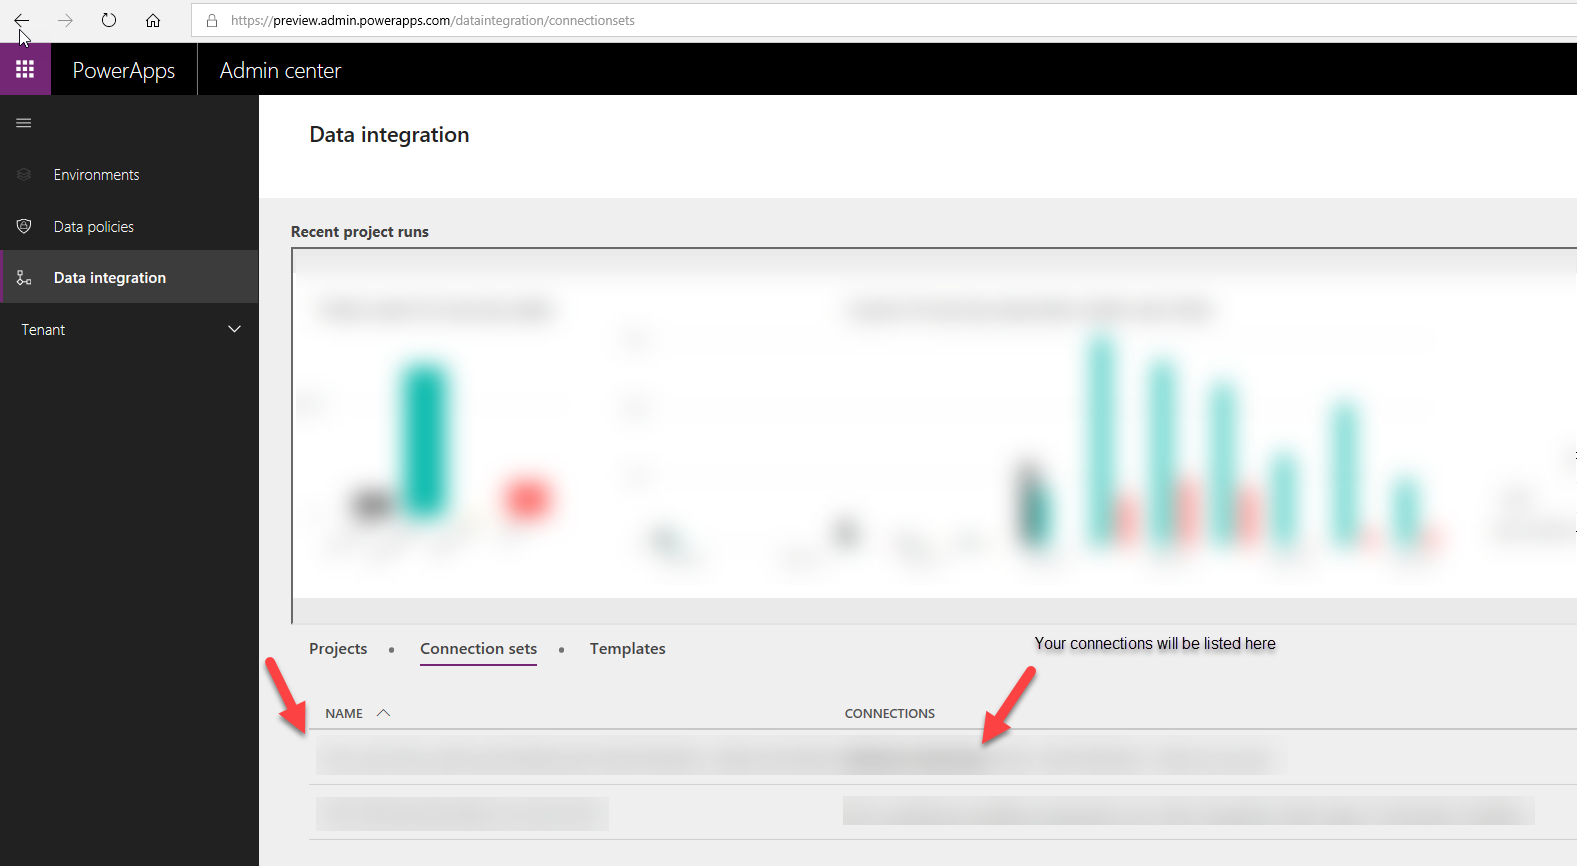
Step 2. Once your connections were created, go to https://preview.admin.powerapps.com/dataintegration/connectionsets and create a new Connection Set adding your connections from step 1 there
This is what you need to get
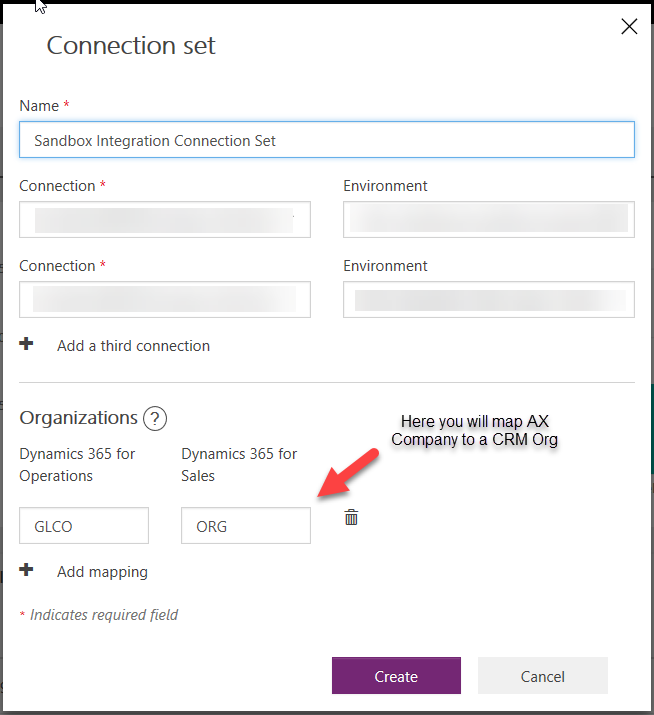
Press a plus button, then choose connections (and environments for each of them) and map the company to a CRM Org. You can add more connections if needed but this guide is for direct integration only. You can also add multiple organization mappings (if you need to map more companies)
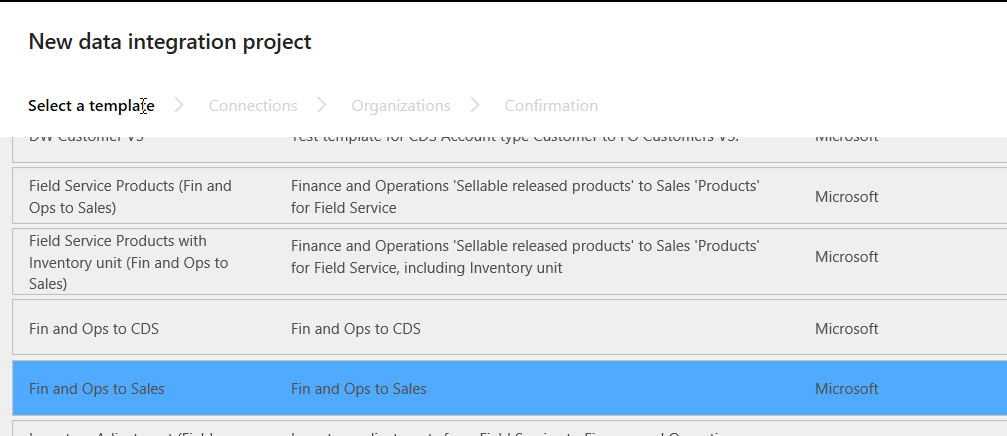
Step 3. Once connections and connection sets were created, it should be good to go with an integration project. Open https://preview.admin.powerapps.com/dataintegration/projects and then create a new project.
You can choose from a number of templates if you want to start with a template (and then adjust mapping). I will be starting from scratch because there is no Customer (D365FO) to Account (D365S) template available yet, so I will choose Fin and Ops to Sales
Then you will have to select a connection set and the organizations to map and finally press Create button
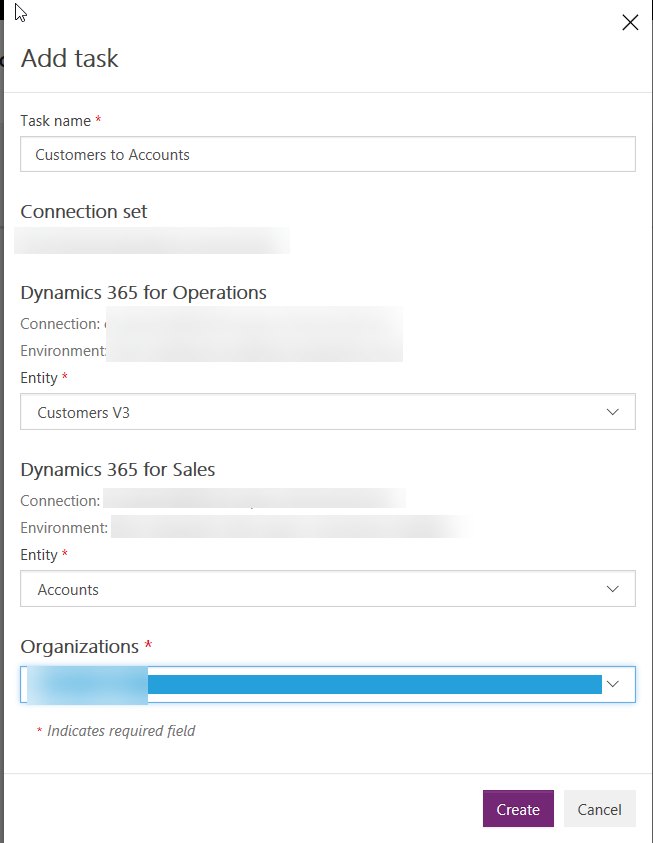
Step 4. Now it’s time to create the mappings. You need to create a new task to be able create the mappings

When you are creating the task, make sure that you use the correct connection, environments and organizations. In this example I am mapping the standard Customers V3 entity from D365FO to a standard Accounts entity from D365S. Please don’t use Customers V2 entity as it is obsolete in D365FO and therefore will not work.
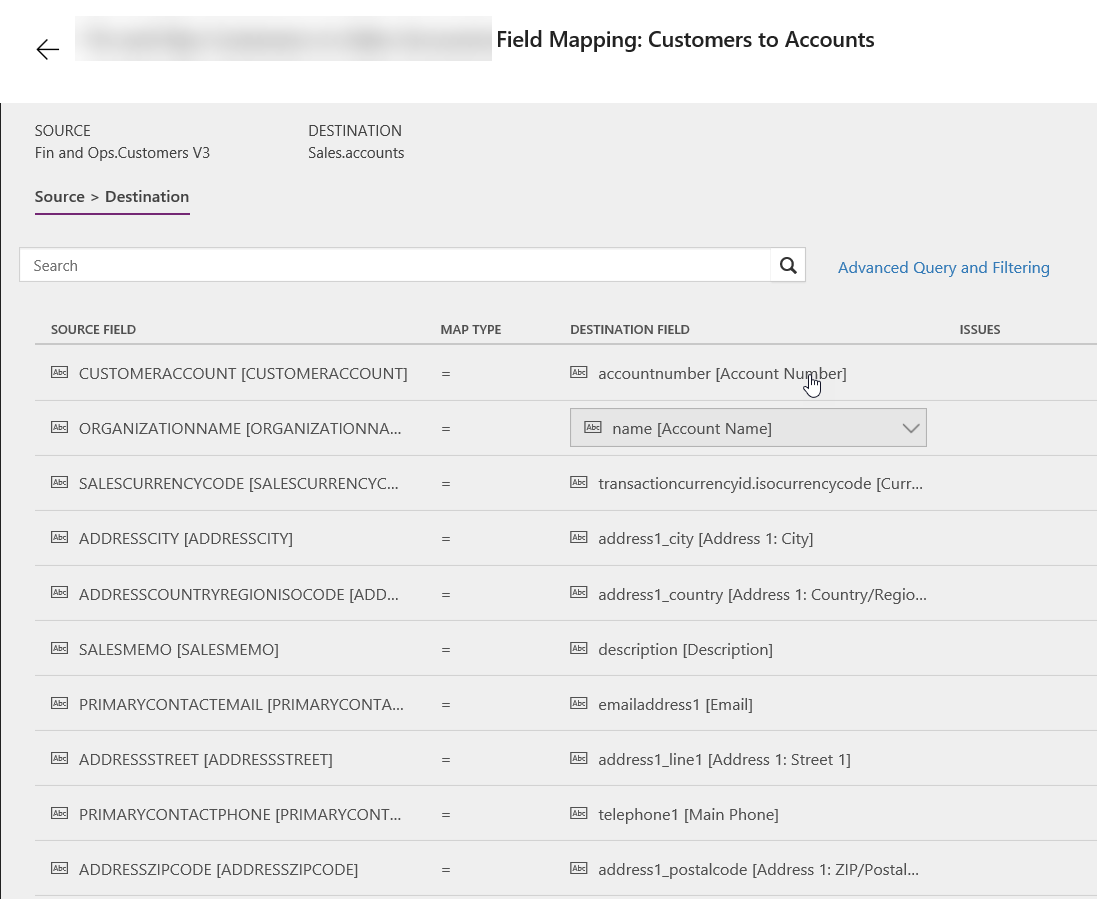
Step 5. Once a new task was created, go to mapping and specify the mapping for the fields by pressing the –> button in the tasks list.
Please make sure you specify the key fields values for the integration as otherwise the map will not work
Step 6. Run it. Once you’ve done your mappings, you are good to schedule the job to run periodically or run it right away to test whether your integration works

Optional step 7. Having more fields in your mapping.
If you need to add more fields to the mapping which do not yet exist in D365FO, you will need to extend the standard entities or create your own. You will need to do development to achieve this and deploy the changes to your D365FO environment.
Once your extensions were implemented in D365FO, it’s a good practice to validate whether the new field is available in DIXF before coming back to CDS and add it to the mapping.
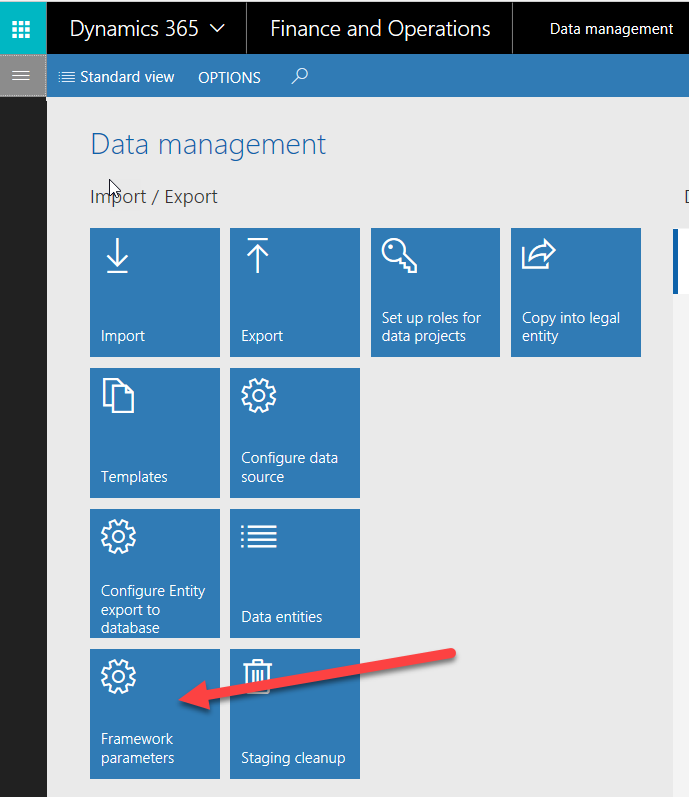
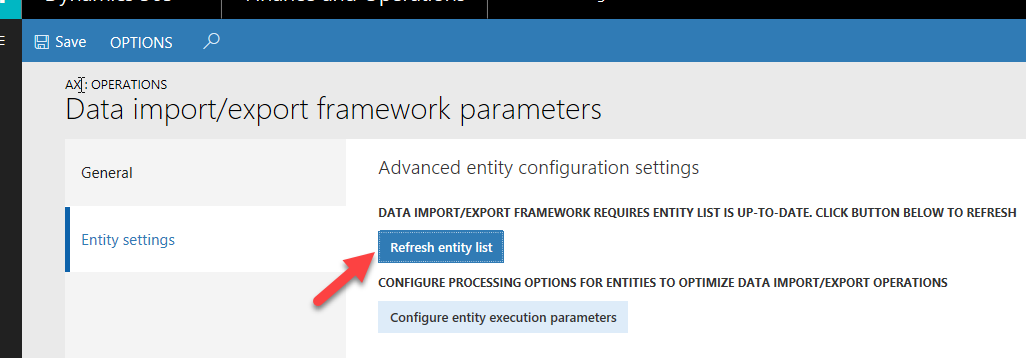
Go to your D365FO environment, then go to Data management and refresh your entities
Once your entities were refreshed, you will be able to see your custom fields in the entity. Go to Data management / Data entities and find the entity you modified or created
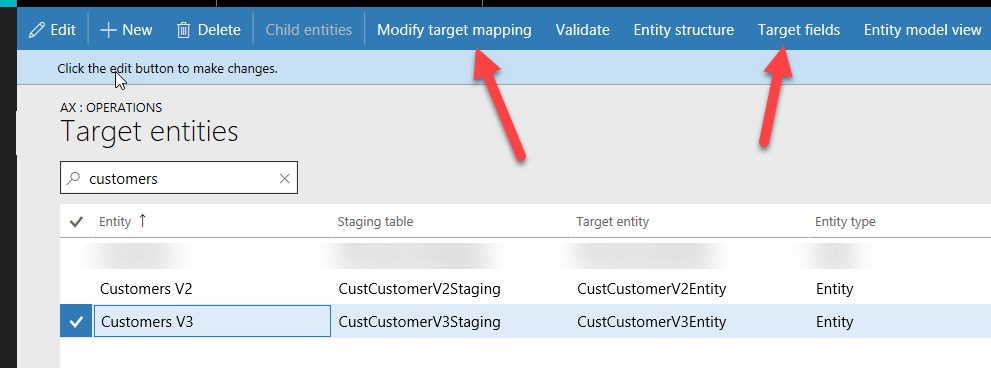
Customers V3 is the entity which was modified
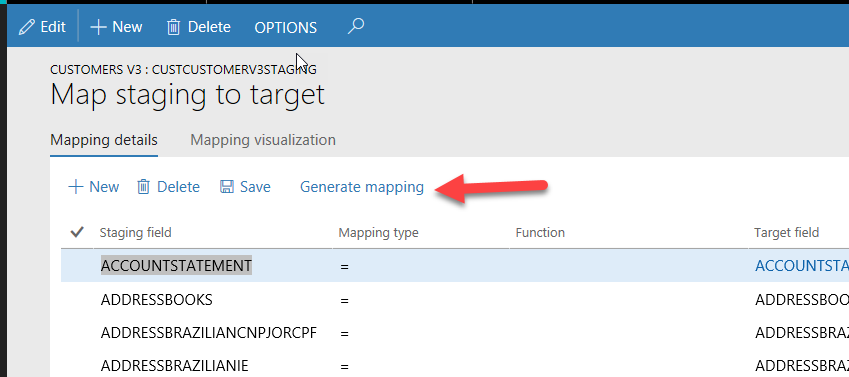
You need to open Target fields and check if you see your fields there. You might need to go to Modify target mapping form and press Generate mapping to regenerate the mapping for the entity
Once you can find your new field in the entity, you need to go back to CDS and refresh entities there
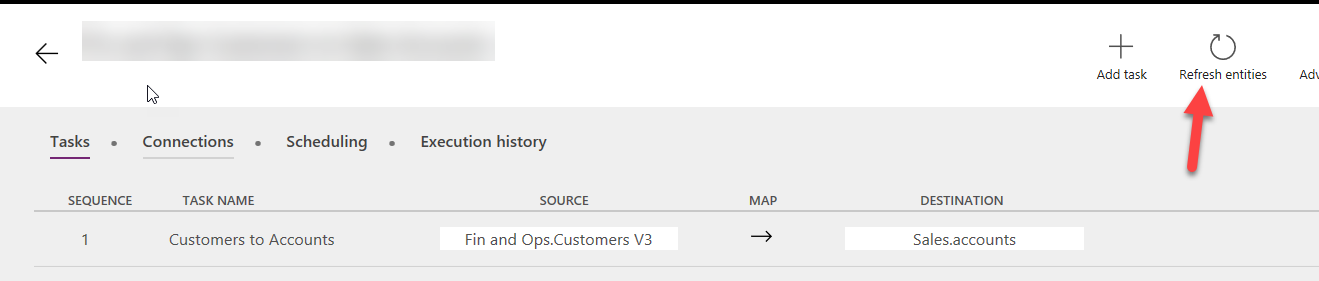
After this you should be able to use your fields in the mappings
If you need to add more fields to D365S, you just need to do your customization in D365S and then publish. After refreshing the entities you should be able to use the new fields for mapping on D365S side as well.
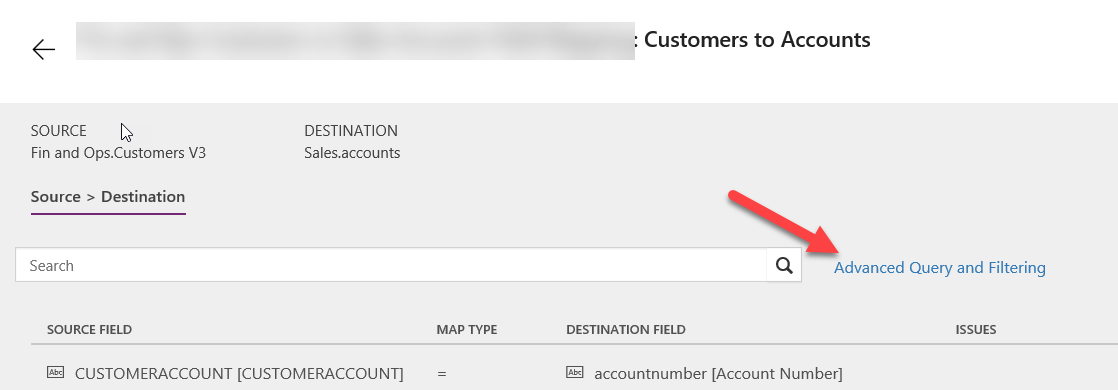
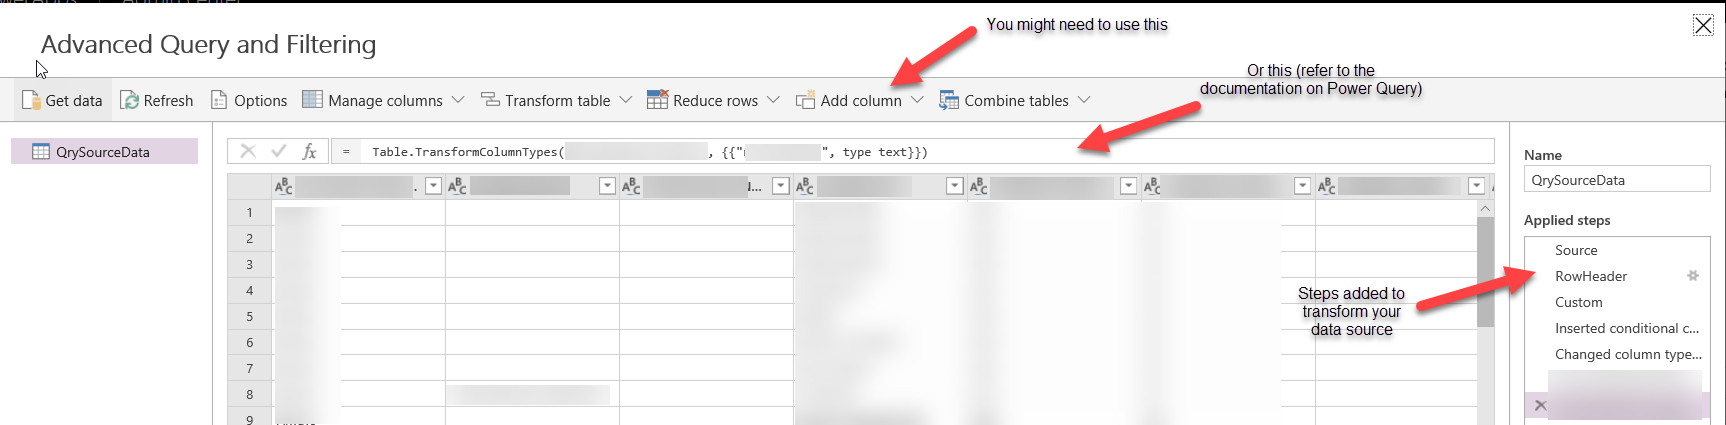
Optional step 8. Using Advanced Query and Filtering. Sometimes you need to filter out some of the records in the source or add calculated fields without customizing the data source. You can use Advanced Query and Filtering for this. First you need to enable this on your project (this cannot be undone)

Once you enable Advanced Query, you will be able to change the data source and add new fields / filter the records out
You use Power Query to do some changes to your data source, please refer the documentation on Power Query
Optional step 9. Integrating delta data only. Normally the integration you are implementing should integrate the records which were created or modified since the last run. By default this is not working like that, e.g. on every integration CDS is picking up all records and integrates them all.
You need to enable change tracking in D365FO in order to synchronize the delta. Go to D365FO and open an entity and then enable Change tracking
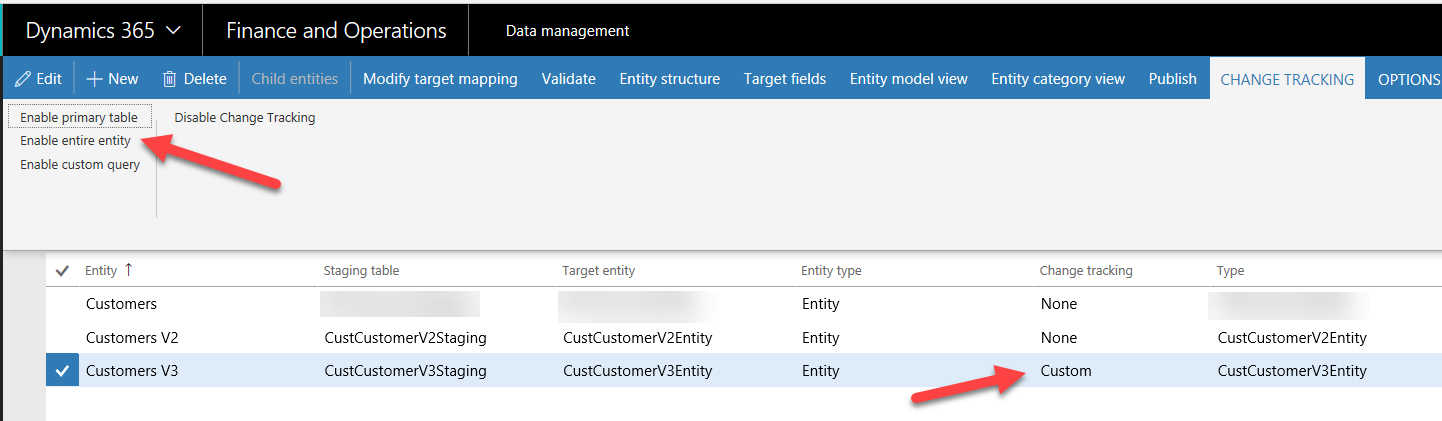
Once you enable this on your data entity, it will send the full set of records the next time and afterwards it will only export the deltas. You can see this in DIXF Job history or execution logs.
If for some reasons you want to send all the records again (for example, you mapped the new field after all the records were synchronized already and you want to update the field for all records now), you can turn Change tracking off, run your maps and then switch Change tracking on again.
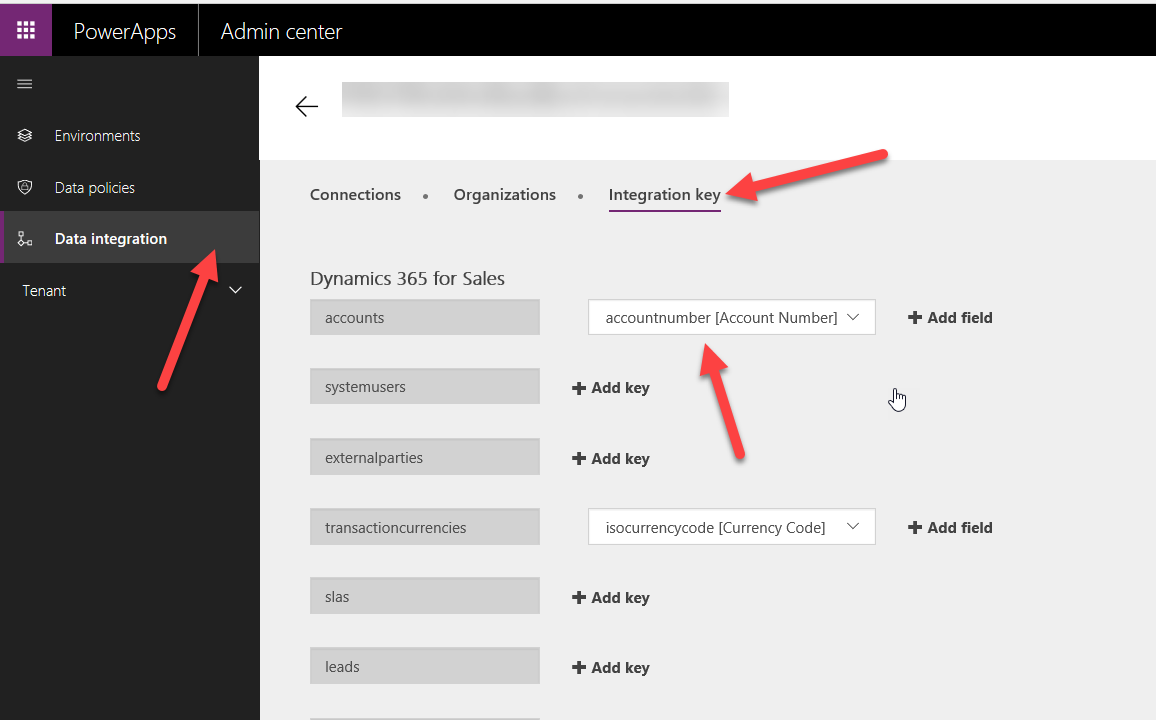
Optional step 10. Integration keys. Sometimes you need to specify a custom integration key to be used when synchronizing the data. For example, you might want to use a custom field in D365S as the key for customer account. In order to achieve that, go to https://preview.admin.powerapps.com/dataintegration and find your connection set there. Then go to integration key tab and build your integration key for the entity
That’s it.
Disclaimer: this is just a high – level guide on the integration process, it might have some redundant steps or might work without some of the steps described here. My goal was to share my personal vision on the configuration and process, hope this will be useful as a high-level guide.
